


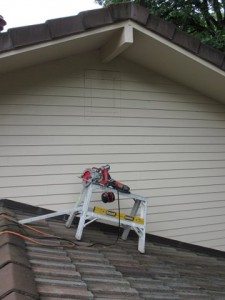
Here is a project picture gallery of an attic Vent installation in Lake Oswego Oregon by Bragg Construction and Remodeling. The home has real wood, cedar siding so a Professional Carpenter is a good person to call to get a quality completion. The home has a tile roof with no other ventilation. This part of the house is called a “gable end”. It is the triangular part of the house related to the roof. This roof was not too steep. The rubber feet of the platform ladder held nicely on the tile roof. In addition to a tape and pencil, can you see the seven main tools used to complete this project? The ladder was very helpful as was the lay out stick we created. First we drilled a pilot hole and verified a clear location inside the attic. Next we used tape, pencil, level and lay out stick to mark the location of the hole and trim.
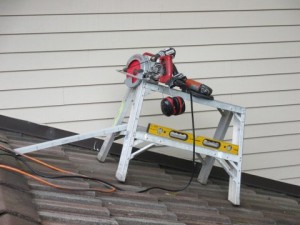
Some of the professional tools needed to layout and cut the exterior siding.
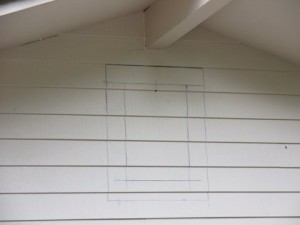
Close up of layout out lines with a pilot hole in the center.
The cedar siding had minimal framing on the back side so we chose a circular saw for the primary cuts. A reciprocating saw would have shaken the thin cedar siding to bits. In the corners we used a great little surgical saw called a multi-master. (This saw enables you to cut square corners, something you cannot do with a round blade in a circular saw). After cutting the hole in the siding we added some backing to the cedar siding.
Marking the location of the vent cutout.

Exterior siding cut away to make way for attic vent.
The trim was built with a 5/4 x 4″ clear, kiln dried, cedar with a rough sawn finish to match the cedar siding on the house. Notice the picture on the ground. We protect the driveway from over spray and prime all the end cuts before assembly This is standard practice every time we work with exterior cedar siding or trim. We fastened the trim material to the wall surrounding the vent with stainless steel nails and screws. The finished vent was painted with 2 coats of full acrylic latex paint. The trim paint is just 1 shade darker than the body.
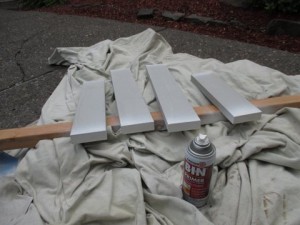
Kiln dried clear cedar trim for the home’s exterior.
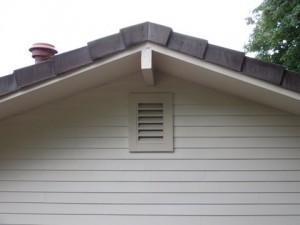
Finished vent with primed and painting trim.
We are able to add attic vents to your roof or Gable end siding. Call a Professional to get your job done right. Here is a close up of the finished product.
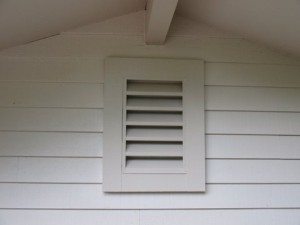
Attic vent (closeup)